


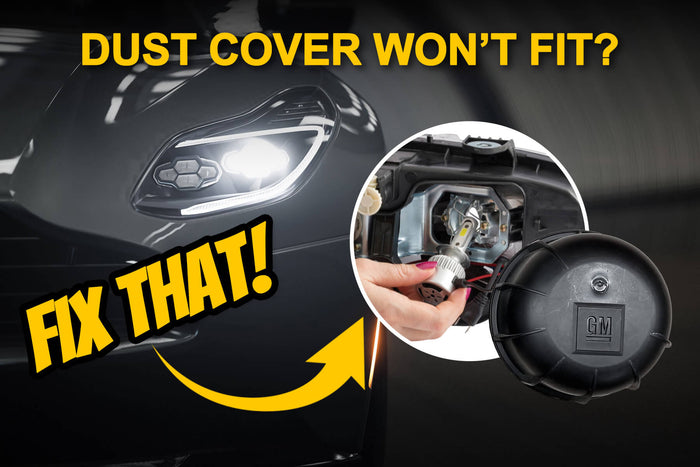
How to Install LED Headlight Bulb When the Dust Cover Won’t Fit?

After upgrading your LED headlights, have you encountered problems like these? Can’t close dust cover? The dust cover is pressing on the fan? Can’t plug the drive in?😢
No worries! This article will provide you with complete installation methods and dust cover modification tips, and also recommends bulbs with good adaptability, helping you solve your doubts in one stop!
Why LED bulb won't fit dust cover?
The reason why LED lights and dust covers are incompatible mainly comes down to the following two parts:
- LED bulb too big for housing---LED bulbs usually have built-in heat sinks (fans), so they have larger bulb bases than halogen bulbs.
- The internal space of the dust cover is limited---the original dust cover is only designed for halogen lamps, and may not be able to cover properly after-market bulbs of various designs, let alone leave extra space.

Struggling with LED Bulb and Dust Cover Compatibility?
Follow These Critical Steps for Safe Installation:
-
Confirm the size of the bulb base
Select the LED bulb base model that matches the headlight assembly to ensure that it is firmly installed and not loose. -
Choose a compact bulb design
Avoid the dust cover from being unable to close due to the bulb being too large, and keep the inside of the lamp group clean and dry. -
Ensure sufficient heat dissipation space
During installation, it is necessary to maintain a heat dissipation gap between the bulb and the dust cover to prevent overheating from affecting performance and life.
Need a headlight update? We’ve picked it up for you!
|
Fan Equipped Headlights
|
Fanless Headlights
|
Compact Design Headlights
|


How to modify dust cover for LED headlight?
If you want to smoothly install different styles of LED bulbs, it is imperative to modify the dust cover for headlight. AUXITO has prepared several common modification options for car owners. Scroll down to find the one that suits you best!
"Go without the fiddly dust covers!"🤕
|
"Go without dust covers" |
"With headlight dust cover!" |


🙅Just kidding! We don't recommend doing this!
Even with daily driving, exposed headlights will continue to accumulate dust and moisture - there is no way to avoid this! If the new LED headlight bulb is too long for the original dust cover to close, you will need to modify the dust cover (headlight dust cover extension for LED headlight) to maintain the seal. Ignoring this problem will lead to light decay, wiring corrosion, and ultimately a higher repair cost.
1. "Hack and Stack" method:
Difficulty Level: ★★
Recommended Users: People who need temporary modification
Materials Needed:
✓2 OEM dust covers
✓High-temperature sealant (silicone or epoxy resin)
 |
 |
 |
Step-by-Step Instructions:
- Cut a large hole in the first OEM dust cover's bottom;
- Remove any interfering heatsink structures from the first housing;
- Stack the second OEM dust cap over the modified one;
- Apply sealant thoroughly between layers for complete waterproofing
Pro Tip:
Wear gloves when handling sealant.
Let sealant cure 24 hours before exposing to moisture.
2. Cap extension:
Difficulty Level: ★★★
Recommended Users: Leisurely DIY hobbyists
Materials Needed:
✓ OEM dust cover (e.g., 11 Colorado Z3.0)
✓ Car-specific cap extension (e.g., A286 extension cap)
✓ High-strength adhesive
✓ Tools: Hole saw
 |
 |
 |
 |
Step-by-Step Instructions:
- Mark and cut 2.5" hole on OEM headlight dust cover (center-aligned)
- Fit extension collar into cut hole
- Apply adhesive evenly along joint, press firmly for 30 seconds
Pro Tips:
Test fit before gluing (ensure no contact with bulb/heatsink)
Cure 24hrs for maximum waterproofing
3. 3D printed dust cover:
Difficulty Level: ★★★★
Recommended Users: Perfectionist car modifiers
Materials Needed:
✓ OEM headlight dust cover measurements
✓ 3D printer (or printing service)
✓ High-temp resistant filament (recommended: ASA or PETG)
Step-by-Step Instructions:
Measure & Design
- Record OEM cap dimensions
- Specify extension depth (0.5-1" ideal)
Printing Process
- Use ≥0.2mm layer height for airtight finish
- Enable 100% infill for durability
 Key Advantages:
▲ Perfect OEM-level fit
▲ Superior sealing vs modified dust cap extensions
▲ High-temp resistance
Trade-offs to Consider:
▲ Higher cost (~2-3x DIY solutions)
▲ 24hr production time required
▲ Requires precise measurements

Regardless of whether the LED headlights cannot be properly covered with dust covers, using high temperature resistant materials and properly extending the headlight dust cover cap will not only allow your LED bulb to have enough space to install, but also improve heat dissipation and extend the life of the bulb!
How to install LED headlights with dust cover?
No modification required? Start the quick installation directly.
TYPE 1: Install a LED headlight bulb with dust cap extension
|
Step1: Test Bulb → Ensure the bulb plug is connected (check if it lights up).
|
Step2: Secure LED → Screw the LED into place properly.
|
|
Step3: Attach Dust Cover → Install the modified headlight dust cover.
|
Step4: Done! → You will get a seal extension that matches original size.
|


TYPE 2: Install a LED headlight bulb with pass-through dust cover
|
Step1 |
Remove LED bulb’s chuck
|
Align wider clip with headlight assembly top
|
| Step2 |
Push OEM dust cover inside out
|
|
| Step3 |
Install LED bulb from raised end inward
|
|
| Step4 |
Align the bulb top to Cover top mark
|
Arch bulb forward, clamp firmly
|
| Step5 |
Insert headlight and twist clockwise to lock
|
Verify LED wick at 3→9 o'clock position
|


Installation completed! Test the bulb lighting effect. If the light cutoff line or focus point is off, please adjust the headlight angle before going on the road to ensure the best lighting pattern!
[Headlight Adjustment Aiming Wall Chart] will help you solve the difficulty of aming the headlight beam!
Maintain Your Headlights
After replacing and installing the LED headlights and dust covers, if you want to reduce the frequency of subsequent maintenance and repairs, you also need to maintain the headlights!
Cleaning
Wipe the lampshade regularly with a soft cloth to remove dust and residue. This maintains over 90% light transmittance for safer night driving and prevents light scattering.
Seal Inspection
Check headlight seals regularly. Replace immediately if cracked or aged to prevent water ingress, fogging, and internal circuit damage.
Dust Cover Check
Replace damaged or loose dust covers promptly. This ensures excellent heat dissipation, prevents dust buildup, and extends LED bulb life 2-3 times.

AUXITO complete headlight maintenance guide is here: [Your Concerns - Headlight Assembly Replacement ]
Final Thoughts
With these headlight dust cover modification and installation tips, you can upgrade your LED headlights with confidence immediately! If you encounter adaptation problems for special models or discover more elegant solutions of dust cap modification, AUXITO invite you to share your insights in the comments - your real-world experience could be the perfect solution another DIYer needs!🤗
FAQs
Q: Why need headlight dust cover? Can I not install them?
A: We usually do not recommend going without dust covers. Headlight dust cover cap is indispensable in maintaining the performance and service life of the headlight.
Dust and dirt prevention: Prevent dust and gravel from entering the headlight to prevent accumulation and affect the brightness of the light.
Waterproof and moisture-proof: Seal moisture to prevent short circuit or corrosion of metal parts.
Protect the cooling system: If the LED bulb with fan is directly exposed, sand and stone/insect corpses may block the fan and cause overheating and damage.

Consequences of not installing dust cover:
Short-Term:
• Dust buildup → dim, scattered light
• Moisture → foggy lenses
Long-Term:
• Wires corrode & short out
• 2x more repairs & costs
Q: Will installing a dust cover affect heat dissipation?
A: Correct installation of the headlight cover will not affect the heat dissipation of the bulb.
However, if the new bulb is too long, the dust cap will fit snugly with the cooling fan (blocking the air inlet) after installation, which will hinder the flow of internal fan airflow and cause overheating. Therefore, dust cap extension is a good upgrade method for car owners who need to install LEDs.
Q: Can I use regular plastic for a headlight dust cover?
A: Avoid this! Regular plastics can't withstand the heat. LED bases reach 80°C+ (halogens even hotter), causing warping or melting (danger!). OEM headlight dust caps use heat-resistant silicone/rubber with flexible seals that maintain protection through temperature changes and vibration. Using improper materials risks light failure - genuine or high-quality aftermarket covers are always worth the investment.
❤️Follow us on Social Media for the latest updates and tips to light up your adventures!
Instagram: @auxitoled
Facebook: @auxitoled
Youtube: @AUXITOLED
Tiktok: @auxito_global @auxito.us


Leave a comment